There are 3 basic steps that need to be carried out.
1) Create Profile and Account.
2) Configure Email.
3) Send Email.
Step 1) Create Profile and Account:
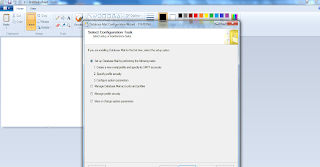
You need to create a profile and account using the Configure Database Mail Wizard which can be accessed from the Configure Database Mail context menu of the Database Mail node in Management Node. This wizard is used to manage accounts, profiles, and Database Mail global settings which are shown below:
You need to create a profile and account using the Configure Database Mail Wizard which can be accessed from the Configure Database Mail context menu of the Database Mail node in Management Node. This wizard is used to manage accounts, profiles, and Database Mail global settings which are shown below:
 |
| Figure 1:- sendingMailstep-1 |
 |
| Figure 2:- sendingmail-step2 |
 |
| Figure 3:- sendingmail-step3 |
 |
| sendingmail-step4 |
 |
| Figure 5:- sendingmail-step5 |
 |
| Figure 6:- sendingmail-step6 |
Step 2) Configure Email.
Upto now your account and profile are created successfully, we need to configure the Database Mail. To Configureit, we may need to enable the Database mail XPs parameter through the sp_configure store procedure, as shown here:
sp_CONFIGURE 'show advanced',1
GO
RECONFIGURE
sp_CONFIGURE 'Database Mail XPs',1
GO
RECONFIGURE
GOStep 3) Send Email.
After all configuration are done, we are now ready to send an email. To send mail, we need to execute a store procedure sp_send_dbmail and provide the required parameters as show below:
 |
| sendingmail-step7 |
No comments:
Post a Comment